
Order Book
The Order Book is the central location for managing open orders across all instruments. The Order Book will display the status of all orders and allow the user to cancel their working orders individually or globally. Users may also amend price and quantity on working orders directly from the Order Book.
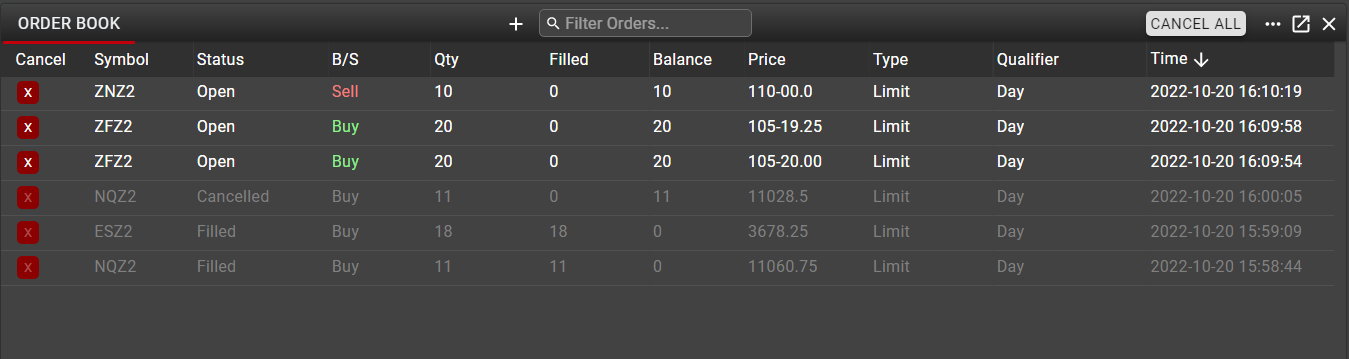
Data in Order Book
The following columns are available for all orders. Any of these columns can be shown or hidden, and may be rearranged by dragging, dropping and re-sizing individual columns according to the user’s preference.
Time: Time at which the order was entered
ID: Unique Order ID assigned to each order by the Rival One application. This ID is used to identify orders within the Rival system and is not representative of the Order ID assigned by the exchange. This ID is particularly useful in identification and troubleshooting when there are questions about an order action.
Symbol: The exchange-defined symbol of the contract
Status: Displays the current status of the order – Open, Filled, Cancelled, Partial, Rejected
B/S: Indicates the direction of the order
Qty: The total quantity of the original order
Filled: The quantity that has been executed
Balance: Remaining open quantity yet to be executed
Price: Price at which the order is currently working. If an order is modified, this price will update from the original entry price.
StopPx: For Stop orders, indicates the trigger price
Type: Specifies the type of the order - Limit, Stop, Stop Limit, for example
Qualifier: Time in Force (TIF) of the order - Day, GTC, GTD, IOC, for example
Algo: Indicates the algo which is driving the order. For details on available algos, see algo descriptions in the Rival Algo article here.
User: The username of the individual who entered the order, as defined in User Settings
Cancel: Displays a Cancel button which will cancel only the order in that row.
To cancel all open orders, the Cancel All button is available in the top right corner of the component.
Sorting and Filtering in Order Book
As with other components in Rival One, filters may be applied to data in the Order Book in an and/or configuration, based on criteria for one or more columns. This is most often used to filter orders for a particular Product or group of Products.
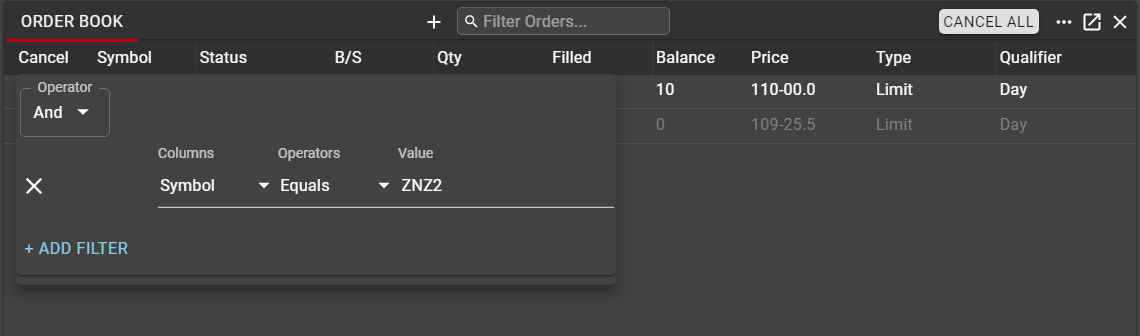
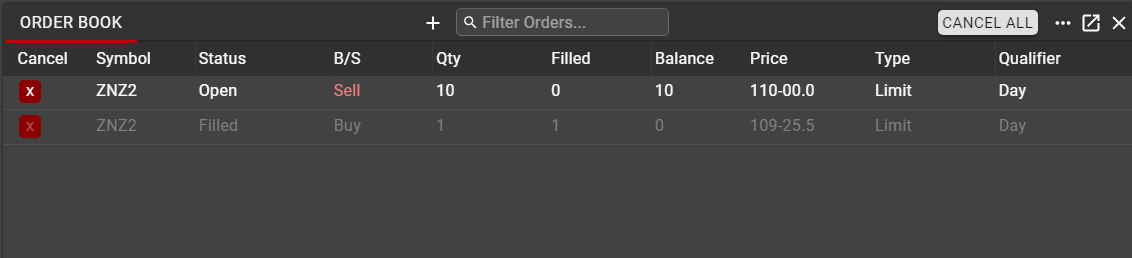
Note that filters in the Order Book should be applied with caution, as any orders that have been filtered out, and which may not be visible in the current view, retain their status and may still be filled at the exchange, whether or not the user has them visible in their workspace.
In order to maintain visibility into all orders, users are encouraged to use tabs in the Order Book when applying filters. Tabs may be added and re-named according to user preference.
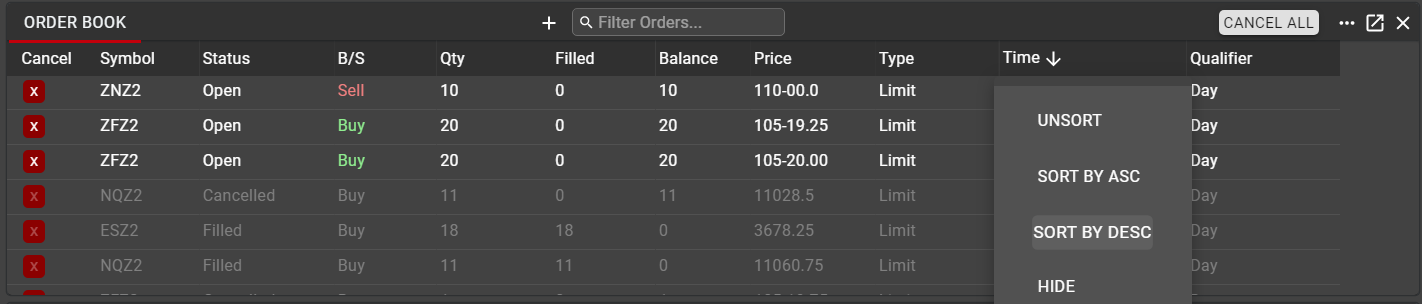
In addition to filtering, any column in Order Book may be sorted. Right-click in the column header to expose the context menu. From this menu, users can apply or remove a sort or may hide the column altogether. As with filtering, sorting should be applied with caution. Orders that have been sorted, and which may not be visible in the current view, retain their status and may still be filled at the exchange, whether or not the user has them visible in their workspace.
Managing Orders from Order Book
Users may amend the price and quantity of any working orders from the Order Book. This may be done on individual orders or for multiple orders at once.
To amend the price or quantity of a working order, double click on either field. This will present an input field where users may tick the price/quantity up or down, or may enter a new value manually.
All changes are staged and displayed as highlighted until the user clicks SAVE
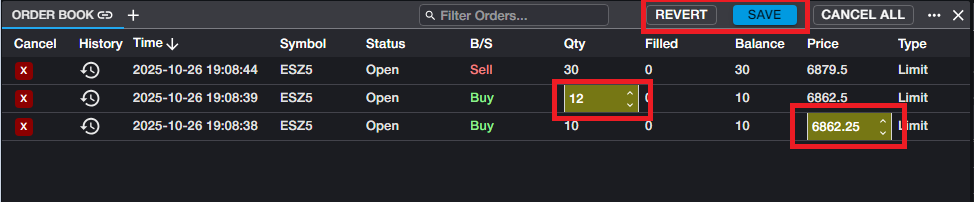
Once SAVE is clicked, all changes are executed. The REVERT button will undo all staged changes and revert all orders to their previous state.
Basket Trader - Uploading Orders
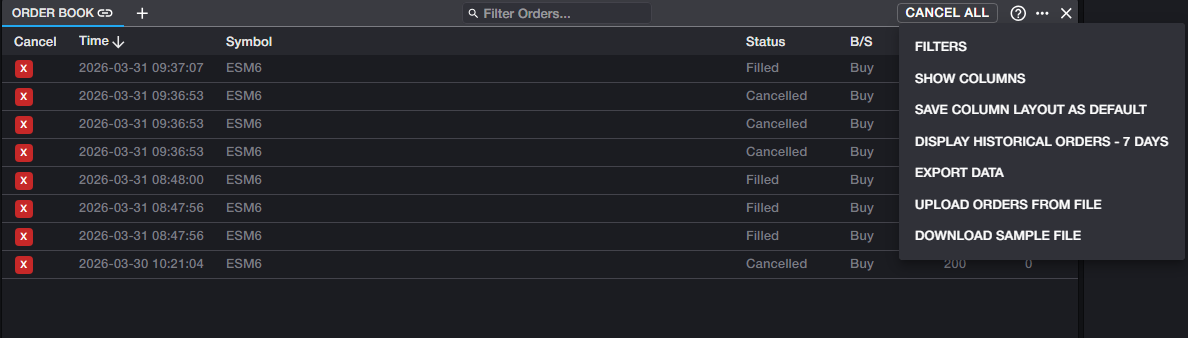
Users have the ability to create orders in a csv file and upload them to the Order Book. Use the 'Upload Orders from File' selection in the Order Book menu:
Once orders have been uploaded from a csv file, they will be in a state of Staged. Staged orders can then be sent/released by the user from the Staged tab, which is generated automatically at the time of upload:

All uploaded orders will be selected by default. The 'Send Orders' button dropdown can be used to select or un-select all orders in the Staged tab, or orders may be selected individually.

Clicking Send Orders will send/release all selected Staged orders, which will then be displayed in the Order Book main tab, or any tab which has an appropriate filter applied. Any orders that were not selected at this time will remain in the Staged tab, with a status of Staged. Staged orders may also be removed altogether by using the Delete icon in that column.
Users may amend the price and quantity of Staged orders before they are sent, in the same manner that price and quantity can be amended on working orders.

Upload File
Users can download a sample csv file to be used for uploading orders, either from the selection in the Order Book menu, or from this article directly.
The upload file must contain the columns in the sample file, in the order they are shown.
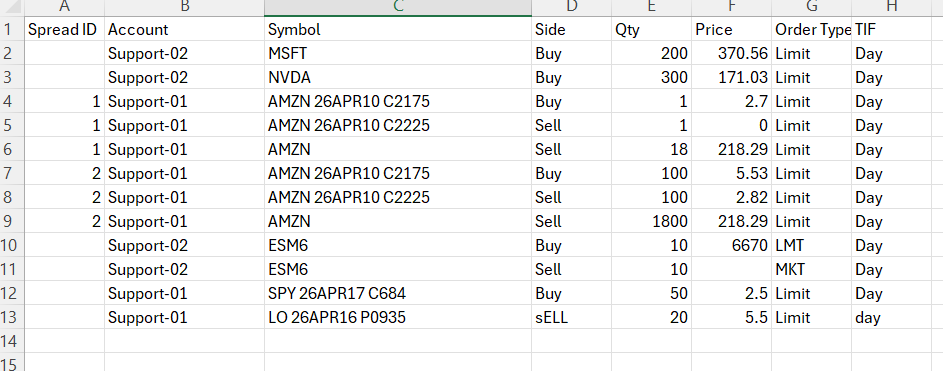
Spread ID: Used to identify individual legs of a multileg spread. Any lines with the same Spread ID will be combined into a multileg order at the time of upload. Spread ID should remain blank for orders that are not part of a multileg spread. Any alphanumeric character can be used for Spread ID.
Account: Only accounts to which the user has access may be entered.
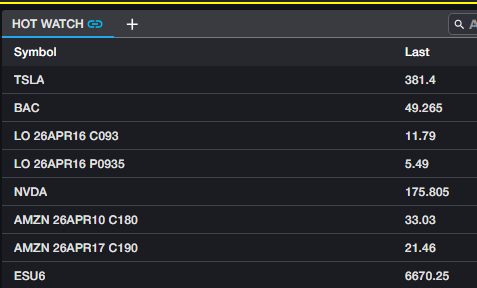
Symbol: Rival's symbology must be used and is case sensitive. The symbology displayed in the Rival One workspace can be used. In many cases, viewing the symbology for any instruments that have been added to a Hotwatch component may be the easiest way to find the correct nomenclature:
Side: Side column is case-insensitive.
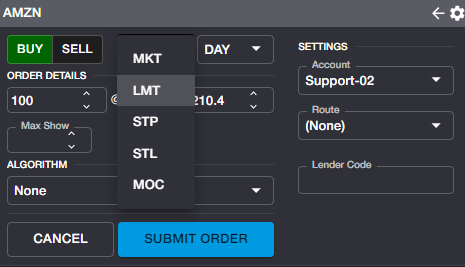
Order Type: Order Type is case-insensitive. In addition, abbreviations may be used for Order Type. For example, Limit/LMT, or Market/MKT. Any abbreviation used in the workspace may be used in the Order Type column. The Order Ticket dropdown can serve as a guide for acceptable abbreviations:
Upload Errors
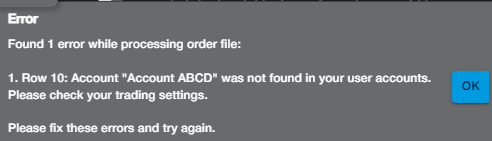
If any of the information in the upload file does not conform or is missing, users will receive an error message in the lower left corner of the workspace when attempting an upload. The error message will specify the incorrect line in the upload doc along with the reason for the rejected upload:
Common errors may be an Account for which the user does not have access:
Or an incorrect symbol name:
